Genre : Top-Down 2D RPG
Development Tools : Unity, PlasticSCM, Asperite
Team Size : 5 Members
Role: Game Designer, UI/UX, Programmer
Development Time : ~ 3 months
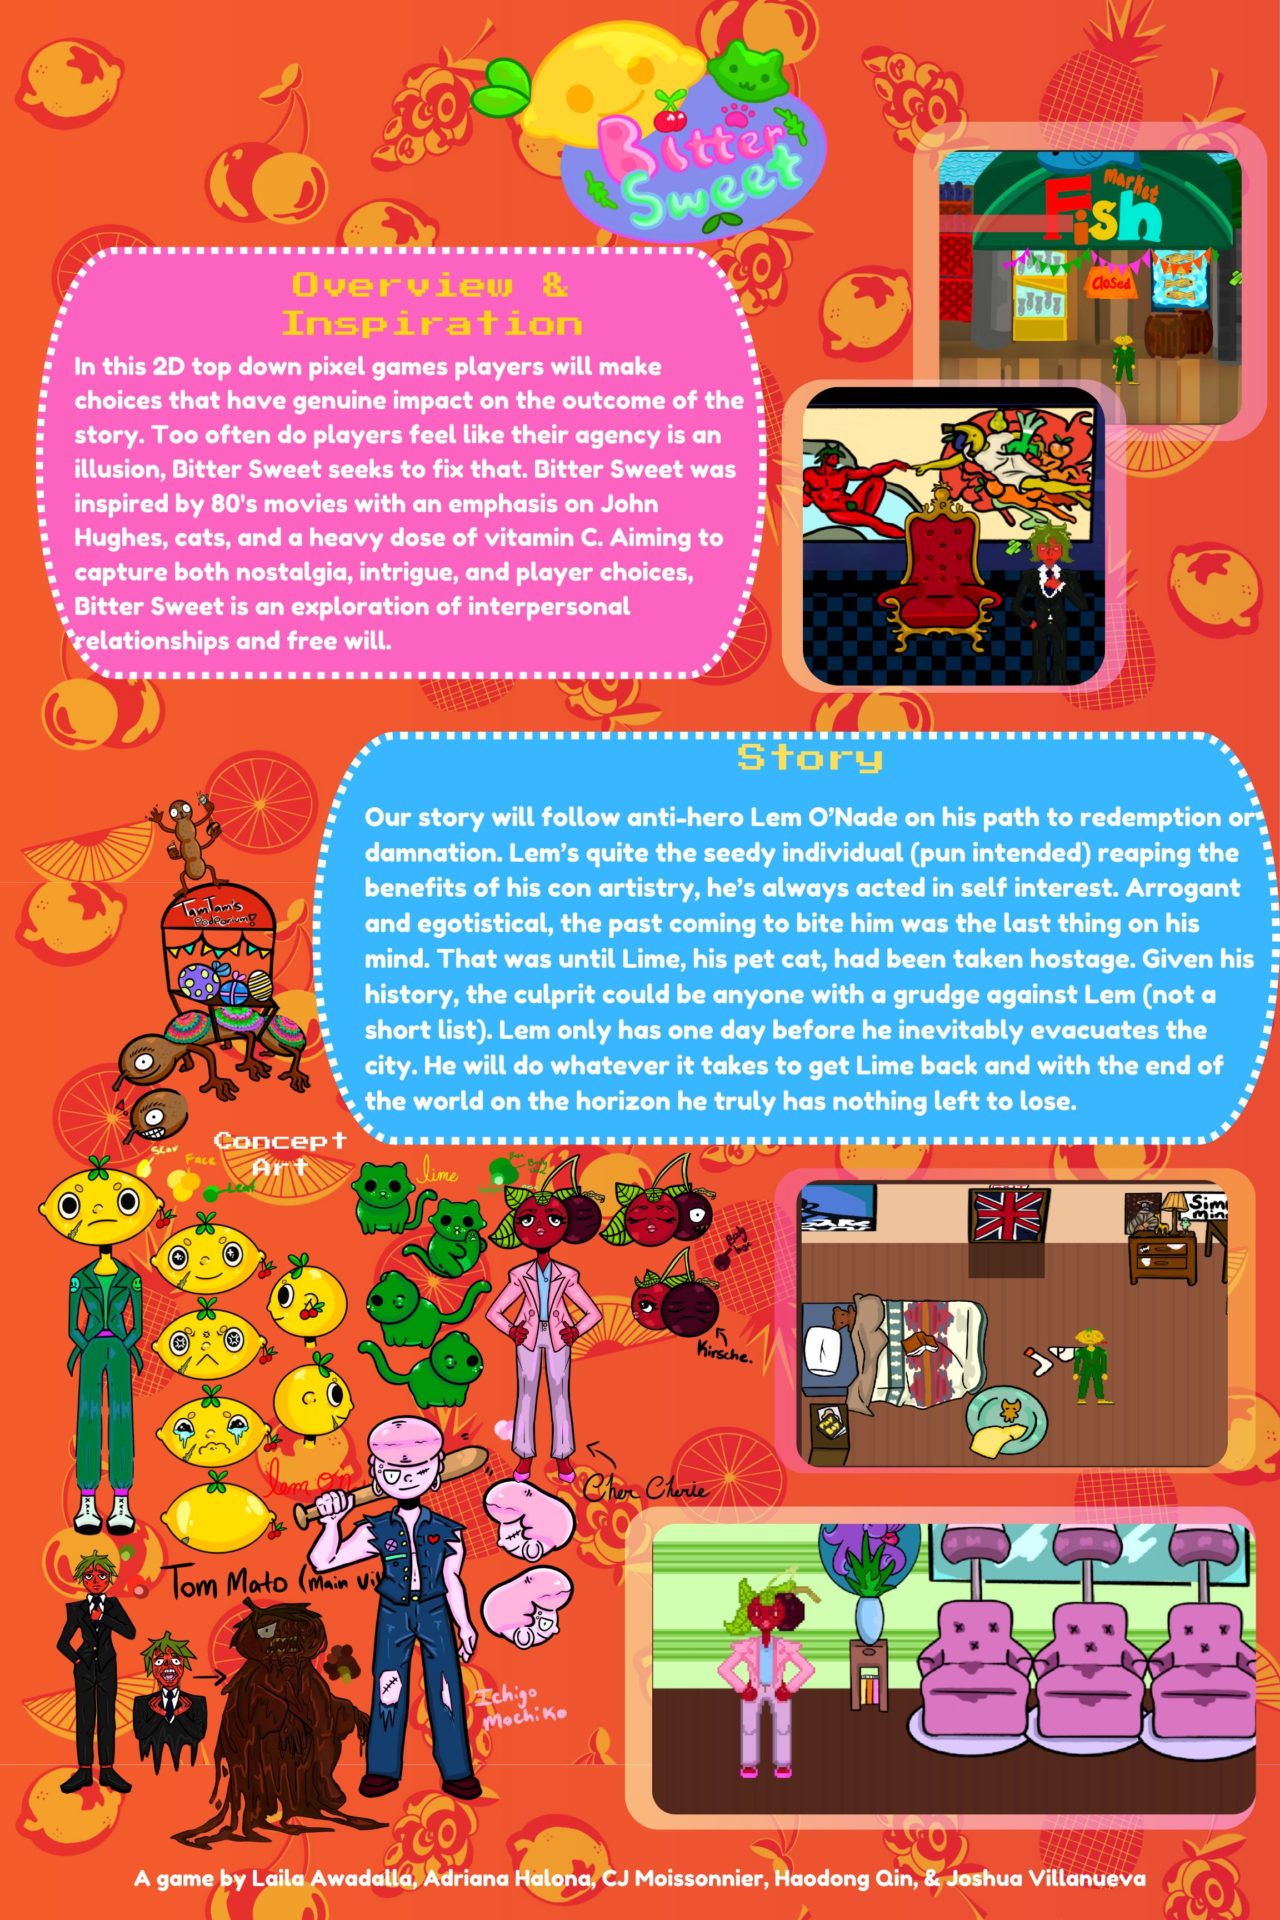
BitterSweet follow ex-con man Lem, as he tries to navigate his past grudges and relationships in order find where his cat Lime is being held hostage in a soon-to-be apocalyptic world.
Game Design Documents
For the first month of development, our group had to prepare and present an official design document to our capstone teacher and professor supervisor. Alongside that, we also needed to prepare a timeline for deliverables so that we can stay on track. When delegating the work, we split the group into 2 teams, the programming team and the design team. The programming team consisted of myself and Haodong, and thus most of the programming and design of game systems would fall upon us. Below are the finalized GANNT chart as well as our design doc.
Design Process
The design choices I made in this team were not centered around the over-arching structure of the game flow and level layouts, but rather focused on game feel and control on the players end. Most of this is centered around the dialogue and interaction systems. I focused on the players getting clear cut feedback on when they are in radius of an interactable with a eye-catching visual exclamation point in order to re-direct them towards the object without wasting time on the environment.
As for dialogue, the story is essentially 90% of the gameplay, this was something that as a team, we knew was going to be the priority coming into it. So I made sure to make the dialogue flow as smoothly as possible between choices and text. I decided to make the text have a little gradual write-in as the lines are spoken to have a more real time effect. This write-in is not too slow, as there is a lot of dialogue to get through in the story, and as the choices are gated and hidden until the dialogue is completely present, it needs to be a bit snappy. The player is also not locked during conversation, so players are able to leave and reset conversations.
Additionally, during the debugging and QA process, I spent a good chunk of time ensuring the movement was satisfying. When transporting the assets in, there were a lot of hitboxes from environmental decor that were cluttering movements, especially in the densely populated house. Took some tweaking in order to ensure that players had a good flow from each key point to another, and didn’t have any unnecessary stuttering in their steps.
Implementation
During this process, I fulfilled mostly the process laid out in the design documents. However, one crucial aspect of gameplay we forgot to include was the dialogue system. Thus, it became one of my core responsibilities in making the dialogue system from scratch and ensuring that it was easy to use for the designers.
In order to do that, I wanted the dialogue options to be customizable in the game engine itself, using the Unity Inspector as a way to instantiate it at any point before play. This meant we didn’t have to import any files, there was no special tool we had to use, and that everyone on the team could use put in dialogue should they come up with stuff.
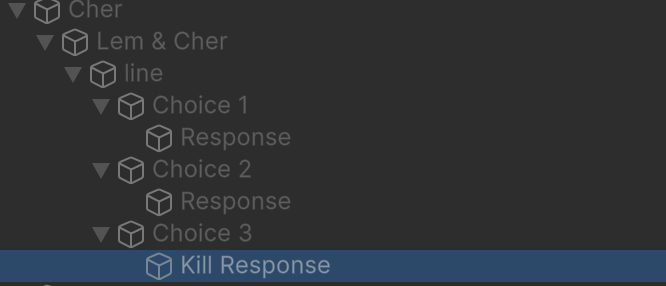
The image on the right is all within Unity, and is how the final system works. Each dialogue is attached to the character that speaks itself, and further branches are represented in child objects.
Dialogue is a class that consists of a list of dialogue line objects. The root object has a trigger connected to the dialogue trigger, which then are auto-detect lines in the direct child from values put in the inspector, with supporting functions to loop through them, set the appropriate portrait and name, and moving onto another child object if needed.
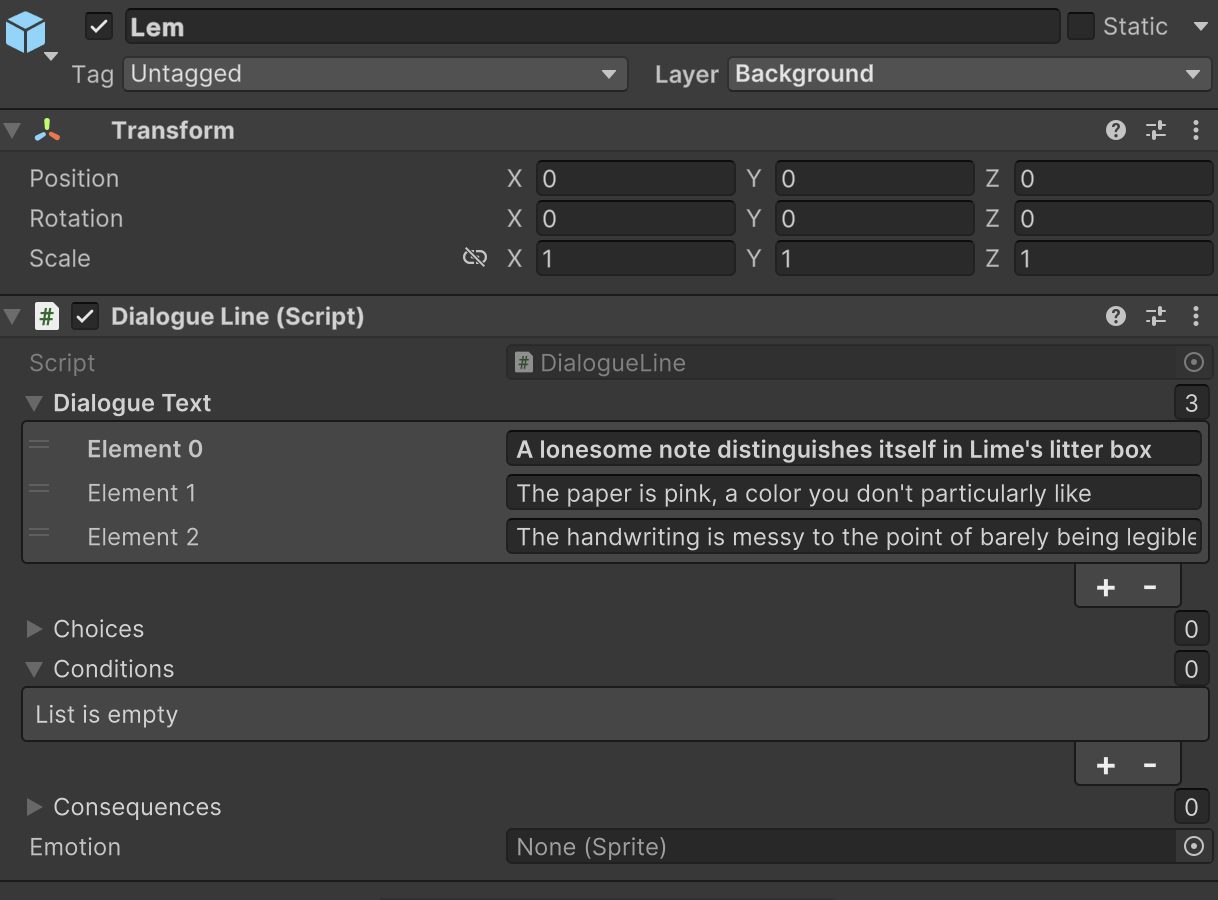
The image to the right is an example of a dialogue line object, where you can see that the user can type their desired lines, add choices for branching dialogues, and even change the characters portrait via the emotion sprite.
We used PlasticSCM instead of GitHub for our repo so I’ve provided a .ZIP file of the dialogue system below for public view. Additionally, the main Dialogue class is shown below.
Dialogue.cs
using System;
using System.Collections.Generic;
using UnityEngine;

public class Dialogue : MonoBehaviour
{
    public List<DialogueLine> dialogueLines;

    public DialogueLine currentLine;

    [SerializeField] private GameObject pickedOption;
    [SerializeField] private GameObject killedOption;
    [SerializeField] private GameObject goodOption;
    [SerializeField] private GameObject lem;
    [SerializeField] private GameObject requireItem;
    public int goodReward;

    void Awake() {
        for( int index = 0; index < transform.childCount; index++ ) {
            var childLine = transform.GetChild( index ).GetComponent<DialogueLine>();
            if( childLine && !dialogueLines.Contains( childLine ) ) dialogueLines.Add( childLine );
        }
    }

    public void SetCurrentLine(DialogueLine line){
        currentLine = line;
    }

    public void Finish() {
        foreach( var line in dialogueLines ) {
            line.currentTextIndex = 0;
        }
        if (pickedOption != null && pickedOption.activeSelf && pickedOption.GetComponent<DialogueChoice>().isChosen){
            transform.parent.gameObject.GetComponent<DialogueTrigger>().UpdateToInventory();
        }
        if(killedOption != null && killedOption.activeSelf && killedOption.GetComponent<DialogueChoice>().isChosen){
            lem.gameObject.GetComponent<Shooting>().totalAmmo--;
            transform.parent.gameObject.SetActive(false);
        }

        if (goodOption != null && goodOption.activeSelf && goodOption.GetComponent<DialogueChoice>().isChosen){
            lem.gameObject.GetComponent<InventorySystem>().gcList
    [lem.gameObject.GetComponent<InventorySystem>().gcList.IndexOf(requireItem)] = null;
            lem.gameObject.GetComponent<InventorySystem>().itemIndex--;
            lem.gameObject.GetComponent<PlayerController>().cash += goodReward;
            transform.parent.gameObject.SetActive(false);
        }
        SetCurrentLine( null );
    }

    public DialogueLine GetNextLine(){
        foreach( var line in dialogueLines ) {
            if( line.ConditionsPass() ) {
                Debug.Log(line.gameObject);
                currentLine = line;
                return currentLine;
            }
        }
        return null;
    }

    private void ExecuteConsequences(List<Consequence> consequences){
        foreach (Consequence consequence in consequences)
        {
            consequence.Execute();
        }
    }
}
The dialogue option took up much of my focus in development as I made it from scratch alone, and this meant I had to connect supporting functionalities around it as well, such as the UI, the interactability of objects and a radius detector for player proximity.
There were couple of things that didn’t quite make it into the final system. The dialogue system has variables set for consequences and conditions, which were supposed to be the after and before triggers for dialogues respectively. I didn’t quite finish their feature, we ended up not needing it. The idea was supposed to be that people would remember how you treat other people, and that would create even more options or even lock you out of options depending on your reputation. This turned out to be too large of a scope for our time frame, and ultimately we decided to keep it simple, with the convo rooted to the object/character.
Outside of developing this core feature, I also worked on miscellaneous things such as implementing all art assets into the engine, bug testing, giving UI functionality, adding animators to characters and putting in sound/audio. Since there were only 1 other programmer besides me, we essentially had to create the whole foundation from the ground up and had the work split up between the two of us.